Get the most out of Ottogrid: A Quick Guide
A beginners, step by step guide to learning Ottogrid
.jpg?width=3840&height=100&quality=90&format=auto) Homam Malkawi
Homam MalkawiOctober 16, 2024
Guide

Ottogrid is a powerful tool that helps you automate manual research tasks. But if you’re new to it, you might wonder how to maximize its potential. This guide will walk you through the basic steps, from creating your first table to customizing it, so you can get the most out Otto.
1. Start by Creating a Table
The first step in Otto is creating a table, which will act as the foundation for everything else you do on the platform. Here are the main ways to get started:
AI-generated table: Otto’s AI can create a table for you. Just chat with the AI, and it will automatically generate and customize the table's columns based on your needs.
Import a CSV or dataset: If you already have data, such as a CSV file or an existing dataset, you can easily import it. This is especially helpful if you're enriching lists or working with pre-existing information.
Use a template: Otto offers a variety of templates designed for different use cases. These templates come with pre-configured tables and columns, making it easy to see what’s possible and start quickly.
2. Add Some Data to Your Table
Once your table is set up, it's time to add a little bit data. If you imported a CSV, this step might already be done, but there are other ways to add data to Otto. Here’s how:
Primary entity focus: Otto’s tables are structured around a primary entity (your first column). For example, if your table is focused on companies, the first column should reflect that.
Add data : You can add data by clicking the dropdown menu and selecting from various sources.
Database search: Otto has built-in databases (like a company, news, people) that you can tap into to populate your table.
General search: You can also run a general search to gather broader information that may not fit into a specific category, like news or trends.
Browse URL: You can also add data by using the browse url. This will scrape the content of the page and all the relevant entities as an option to save to the table
Manually paste: If you want to test, or already have a few companies in mind you can use the bulk paste of companies. or click the new row and add some data.
3. Perfect your table
Before you go all in, we recommend starting small. Add just one or two pieces of data to see how things work. Here’s the workflow we generally reccomend:
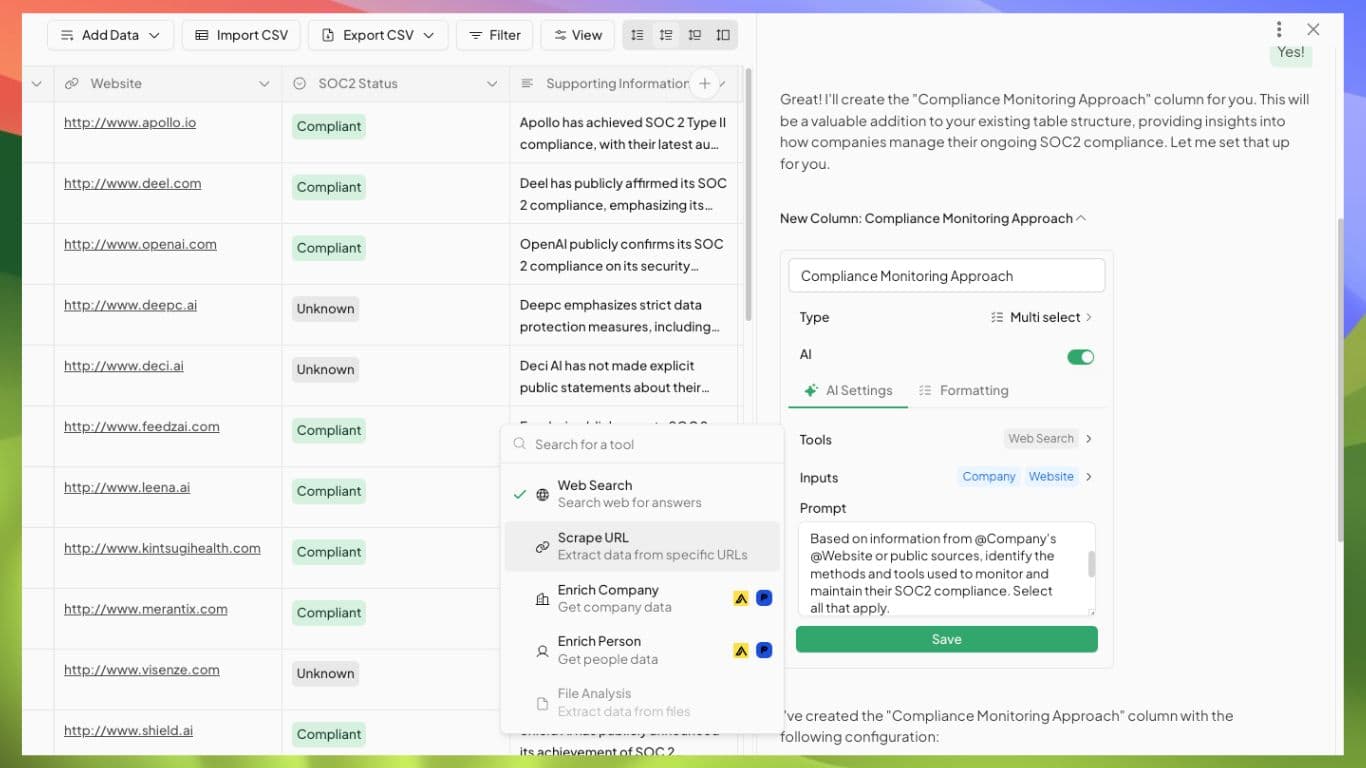
Review, update or create new columns: Look through the column and see the the prompt and tools are to your liking. You can ask Otto’s AI to help generate new columns if you're unsure what data to include.
Iterate and refine: After adding a few rows, run your table and review the outputs. Adjust and tweak the columns as needed to make sure everything is aligned with your goals.
Use the AI assistant: Our AI assistant is trained on how to use Ottogrid, and can make brand you columns for you, update prompts, and even give you suggestions you might not have thought of before!

4. Add More Data
Once your table is working well with the first few pieces of data, you can scale up by adding more information. The beauty of Otto is its ability to handle large datasets and automate tasks quickly, but starting small ensures everything works smoothly before you go big.
When you're ready, you can start to add tons of data. Either use our database of companies, a list, or general web search to help you quickly populate the tables primary column.
Autofill magic: After you’ve added data for your primary entity, Otto can automate hundreds of tasks in minutes, saving you time and effort.
Conclusion
Getting started with Otto is all about understanding how to create, customize, and expand your tables effectively. Whether you use AI to generate your first table, import data, or start with a template, following these steps will help you maximize what Otto can do. Start small, tweak as you go, and then scale up as you become more comfortable.
Otto is designed to automate your workflow, but taking the time to set up your tables correctly will ensure you get the best results.